Thursday, July 28, 2011

Rhubarb Bar Mishap

For those of you who don't know her yet, this is miss Aston

Well this was her about 5 months ago when Mark & I first got her. Needless to say she is MUCH bigger now, and figuring out that with her new size there is much to be discovered. 

Mark has been away for work for the last 3 weeks, so with just me home alone I haven't been spending much time in the kitchen because he isn't home to eat the creations. He came home the other day to spend the night, so I thought what better a time than to use up the rest of my frozen rhubarb from my grandma's garden. I decided to make some strawberry rhubarb crumble bars from a recipe I kinda adapted from others and created as I went. 


Fresh from the oven! 

Strawberry Rhubarb Oat Crumble Squares

Base:
1 cup whole wheat flour
1 1/2 cups oats (I used Quaker quick oats)
1/2 tsp baking soda
1/2 cup brown sugar
1 egg
1/2 cup applesauce
1/4 cup maple syrup
2 Tbsp milk

Filling:
1 cup strawberries diced
1 cup rhubarb stalks diced
3 Tbsp sugar
2 Tbsp water


Preheat oven to 350F and grease an 8x8 baking pan. Heat the strawberries, rhubarb, and sugar with water in a pot until they begin to boil. Once they begin to boil, simmer until thick about 8-10 minutes. Once you remove from the heat, allow this mixture to cool for about 10 minutes to it has time to really set and thicken up. 

Mix all the dry ingredients in a large mixing bowl and whisk. In a seperate small bowl, mix all the wet ingredients and stir until smooth. Add this wet mixture to the large bowl containing the dry mixture. Stir this together until just combined. This mixture should be fairly thick, but crumbly. Save about 3/4 cup of this mixture to crumble over the top. Press the rest of this into the greased baking pan and press down firmly. Pour the thickened rhubarb strawberry mixture overtop of this base and spread out evenly. Then sprinkle the remaining oat mix evenly over the top of this filling layer. Bake for about 30 minutes or until golden. 


However, once it was cooling time for my lovely little bars.... I cut them each into their own respective size after cooling in the pan, and laid them out on the counter on top of this cutting board. I proceeded to carry on doing things around the house while these were out to cool.... 


And from 16 squares...I came back to this many remaining. Now Mark being gone for a few weeks 
was definately excited for treats....but not THAT excited.

Turned around to find the culprit...

Yes, she has discovered with her new size that jumping up to the edge of the counter and using her paws to swipe some human treats is a fun time. 

At least Mark & I still got to eat the remaining 4 squares, and they were delicious!! And from the sounds Aston's tummy made for 2 days and the fact that she didn't touch a bite of kibble for 2 days after the fact, I'd say she learnt the hard way to keep her grimy little paws off the counter.



Wednesday, July 27, 2011

A Sunny New Start

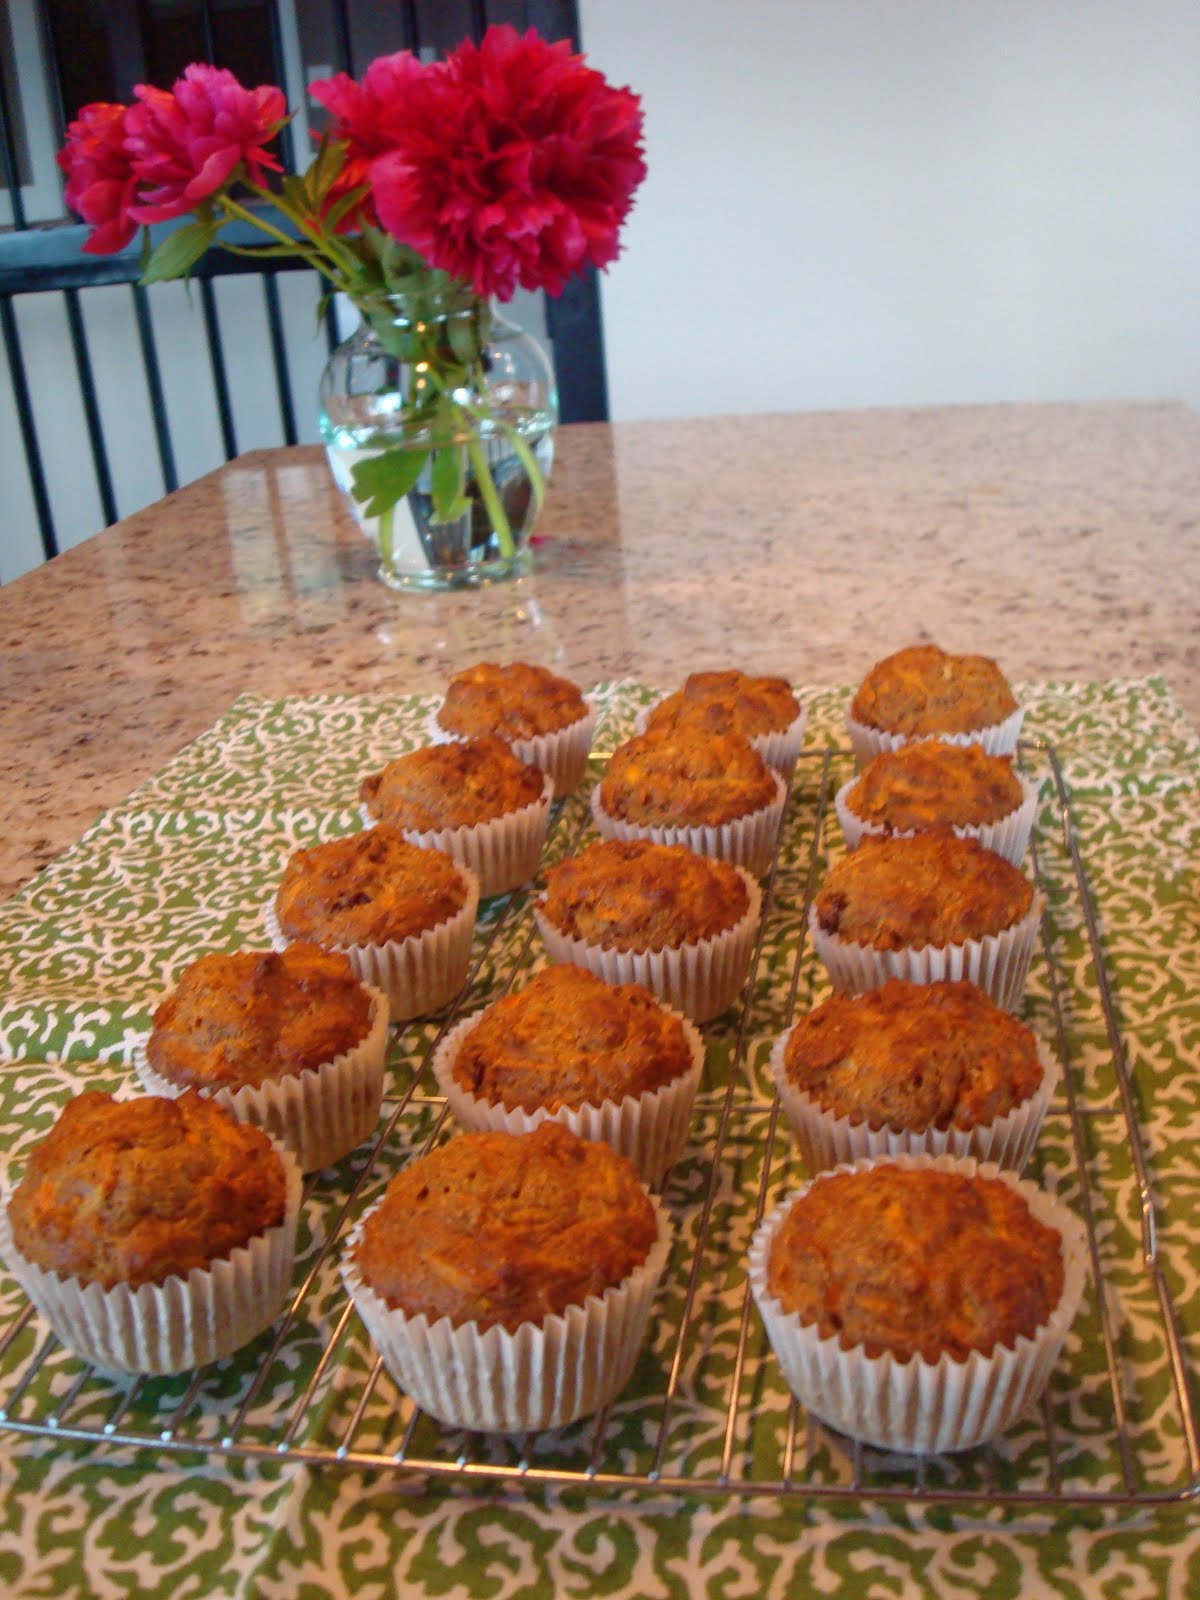
So as promised, I am back in full force with my posts! To celebrate my "new start" to blogging, I thought a muffin perfect to start a sunny morning would be a great place to start.


These muffins were my Auntie Pat's who recently passed away. My grandma and I baked a batch the other day from my Auntie Pat's original recipe, but I thought it would be fun to go home and try my own healthy take on them! The original recipe is relatively healthy to begin with, but uses ALOT of oil to moisten them, so here is my take!

"Sunnier" Rise & Shine Muffins

2 cups whole wheat flour
2 tsp baking soda
1/2 tsp salt
1/2 cup brown sugar
1/2 cup maple syrup or agave syrup
2 tsp cinnamon
2 cups grated carrots
1/2 cup unsweetened coconut
2 cups chopped apple
1/2 cup chopped walnuts
2 eggs
1 cup applesauce
2 tsp vanilla

Whisk together all dry ingredients in a large bowl. Then add fruit, followed by eggs, maple syrup, applesauce, and vanilla. Bake at 350 degrees for 18-20 minutes. Allow them to cool in the pan for a few minutes before transferring to a cooling rack.


My favorite thing about these muffins is that they freeze so well! And they come out so moist and fruity! A great reason to "rise & shine" if you ask me!

Tuesday, July 26, 2011

Just Too Busy!!

So it seems as though I started my blog at a bad time. I started it and then life just took over and got so crazy (ie: new job, etc. ). However, I have still been doing a ton of baking and picture taking...just not making the effort to get my posts up! But I assure you that this is all about to change... starting tomorrow, I am back on board 110% and will be posting daily!


In order to make it easier to fit into my life, I am no longer just going to be posting baking recipes, but also my cooking recipes and just general recipes I make. This means however, A LOT more healthy posts haha as everyone who knows me knows I like to go a little overboard on the healthy eating. But don't worry, there will still be plenty or butter-laden baking recipes to follow ;)

I'm off to get some rest so I can be full force back to the blog tomorrow!!

Tuesday, June 21, 2011

Chocolate Almond Raspberry Squares


I was away all last week going to school, so I didn't have a chance to do any baking, being away from home and all. This week I jumped right in and was eager to get back at it. I've been having this odd craving lately for a raspberry jam sandwich, don't ask me why, I know its a very odd craving. So I opted to make this recipe of my Grandma's for raspberry squares. I even used homemade raspberry jam to make them...Mmmmm.

These are supposed to make a very thin square and fill a 9x13 pan, but I prefer them much thicker by making them in an 8x8 pan.


Grandma's Chocolate Almond Raspberry Squares


-       1 ¾ cups flour
-       1 cup sugar
-       1 cup margarine
-       1 egg, lightly beaten
-       ½ tsp almond extract
-       1 cup raspberry jam
-       1 cup chocolate chips
-       ¾ cup sliced almonds


Preheat oven to 350 degrees. Grease 9x13 inch pan. In a large bowl, thoroughly combine flour and sugar. Cut in margarine. Set aside 1 cup of flour mixture. Press remaining mixture into prepared baking pan. Evenly spread jam over dough.

Thoroughly combine reserved flour mixture, chocolate chips, and almonds. Evenly spoon topping over jam layer, and press down with the back of a spoon. 

Bake for 40 minutes or until lightly brown. Cool in pan, and then cut into squares. 


Thursday, June 9, 2011

"Lots-Of-Ways Banana Cake"

A moist, coconut-ty, rummy, banana-y delight!


So I've been reading a lot about the famous Dorie Greenspan these days & waiting patiently to get my hands on a copy of her book "Baking: From My Home To Yours". My lucky day finally came yesterday!
Looking through this book for the first time was... overwhelming to say the least- - I wanted to make every recipe on every page immediately. However, bananas being one of my all time favorite foods, I opted to make the ever so versatile "Lots-Of-Ways" Banana Cake". And I was not sorry!


To get this recipe, you'll have to check out pages 204-205 of Dorie's new book... as well as every other page! This is the particular way I followed the recipe:

"Lots-Of-Ways Banana Cake"
- 2 2/3 cup flour        
- 4 very ripe bananas
- 1 1/4 tsp salt          
- 1/2 cup sour cream 
- 1/2 tsp salt             
- 1/2 tsp freshly grated nutmeg
- 12 Tbsps butter    
- 1 cup shredded coconut
- 2 eggs   
- 1 cup packed brown sugar   
- 3/4 cup white sugar  
- 1 1/2 tsps vanilla extract           
- 2 Tbsps dark rum


 I opted for a chocolate whipped cream frosting to top it all off as well, I simply used:

-500mL of regular whipped cream
-2-3 Tbsps of sugar (to taste)
-2-3 Tbsps of cocoa powder. 


Monday, June 6, 2011

No Bake Heatwave

We experienced a bit of a weekend heat wave this weekend. This being said, there was no way I was turning on the oven with it being 26 degrees. I generally don't make no-bake recipes, but this one sounded delicious, so I thought I'd try it!


These are especially rich, and best enjoyed with a nice cup of coffee to cut a bit of the sweetness. Other than that, definitely a make-again. I also found that they set VERY quickly. within about 20 minutes in the fridge.

No Bake Peanut Butter Squares (From The Sweetest Kitchen)

- 3/4 cup graham cracker crumbs                 - 1 3/4 cups icing sugar
- 3/4 cup creamy peanut butter                    - 1/2 cup margarine
- 3/4 cup semi sweet chocolate                     - 2 tsp peanut butter (or shortening)

In a large bowl, combine the graham cracker crumbs, icing sugar, peanut butter, & margarine. Beat this until well combined and creamy. Press into a parchment or wax paper lined 8x8 baking pan. Make sure to pat this mixture down well and make it smooth. 


Melt chocolate and peanut butter (or shortening). Pour this mixture over the graham cracker layer and spread out evenly. I found tapping the pan down on the counter helped a lot. Place this in the refrigerator just until chocolate is set & then cut into squares. 

(This is why the wax paper lining of the pan in so important; trust me, you won't regret how easy it makes your life when the bars have set)


VIOLA!


Friday, June 3, 2011

Strawberry Baking Powder Biscuits

Here it is!! The first recipe!!

This recipe is an adaptation of my grandma's baking powder biscuits (basically a scone). I've added strawberries to make them into a sweet treat!

Let me first say that if some of the recipes are slightly vague (I'll try to elaborate on them and explain them) it is because they come from my grandma's instructions. One day I hope to be as a good cook as her, because I have never seen her measure a single ingredient!! Therefore, some of the recipes may not state a specific quantity, but rather a little of this and a little of that. But I'll try to keep them as easy to follow as possible!

These are probably the lightest and fluffiest little biscuits I have ever enjoyed. When my grandma makes them, she makes them into circles using a mason jar to cut circles from the dough. I prefer the look of a square Starbucks-esque looking scone, but either shape works the same! 

Grandma's Baking Powder Biscuits with Strawberries

Ingredients
- 2 cups flour                      - 1/2 tsp salt
- 4 tsp baking powder         - 1 egg
- 4 large Tbsps shortening (yes, shortening, this is one exception when you won't regret it)
- 1 cup chopped fresh strawberries
- 2 Tbsp plain yogurt (strawberry yogurt would be good too!)
- milk

To Make
In a large bowl, whisk together all the dry ingredients. Cut in the shortening, until dough is crumbly-looking. Gently toss in the chopped strawberries.

Next, add the 2 Tbsp yogurt. Then, add in enough milk to make a soft, sticky dough. (DO NOT overdo it on the milk, scones are supposed to be dry but fluffy). Pat this out onto a well-floured surface (Grandma uses a cutting board, I prefer the granite). Pat the dough down into a large disc about a 1/2 inch thick. Cut this into 8 equal sized wedges. Place the dough wedges onto greased baking sheets.

**For softer biscuits, the dough should be placed close together, for crusty biscuits, spread them far apart


Bake these lovely little triangles at 450 degrees for 10-12 minutes, or until brown & crusty. 

I prefer them a little warm, but once cooled, they are delicious plain, but even better warmed and spread with a little butter. 

These ones here just happen to be my breakfast for the weekend ahead....YYYUUMMMM!!!